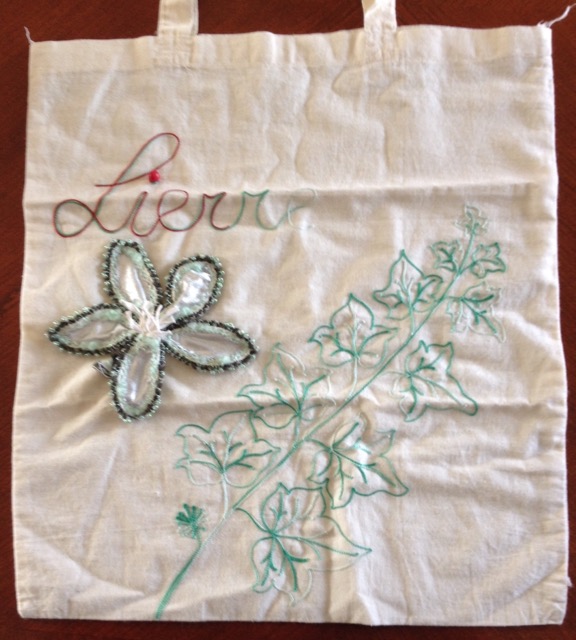
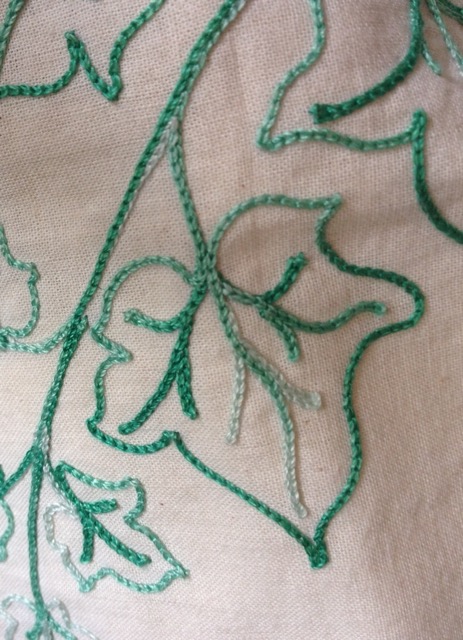
Lier lace which originates in the town of Lier in Belgium. It is a form of tamboured net, You Tube instructions here. The tambouring was also done onto plain fabric.
I have a calico tote bag which I recieved some years ago in an Arachne Secret Pal exchange. It is Lier embroidery on calico (US muslin) with a pun on the word Lierre which is french for ivy. The 3D flower is my work from a Lace Guild workshop, it's bobbin lace with textured threads and beads around silver lame fabric petals.
|
|
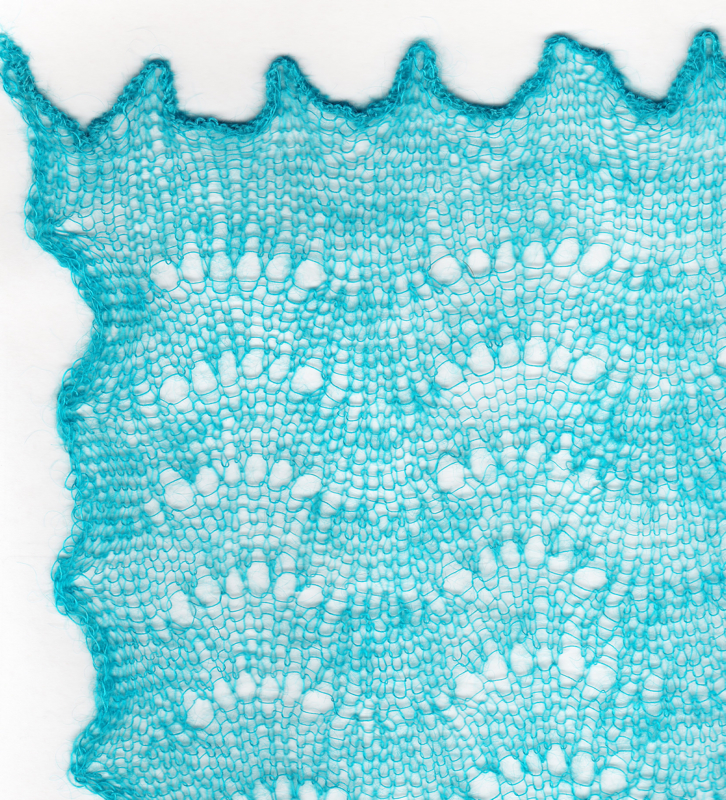
Recent discussions on Ravelry and Arachne about the shawl wrapped around Prince George of Cambridge as he left the materinity hospital have established that itl was made in Nottingham by G H Hurt and Son of Chilwell. Nottingham, and that it is a superfine merino wool Christening shawl.
Back in 1987 I took a coach party to Nottingham where we saw the large lace machines, but also had a guided tour of the G H Hurt factory, by Mr Henry Hurt, who showed us an old knitting frame, about 250 yearsold but similar to the one invented by Rev William Lee in 1589. We went on to see the (then) modern knitting machines with the carriages moving backwards and forwards automatically. I seem to recall seeing Jacquard cards so maybe they were not electronic machines. I also recall Mr Hurt telling us that back in 1948 Princess Elizabeth (now Queen Elizabeth II) placed an order for two dozen shawls for the impending birth of Prince Charles.
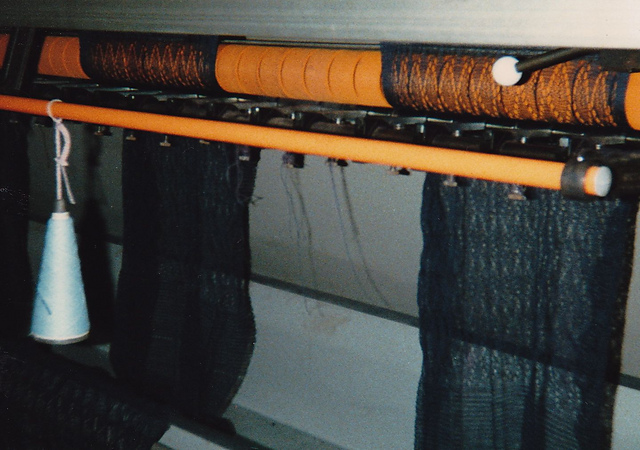
Long lengths of lace knitting coming off the machines.
There is a garter stitch border along each edge and each scarf or shawl length was separated by a band of garter stitch
(just visible bottom right of the photo).
Once off the machines the very long lengths of knitting were taken upstairs to a woman who used an overlocking machine (serger) with matching yarn to separate and hem the top and bottom of each shawl. Sorry I have no photo of that.
Then the individual pieces were wetted and blocked by two girls who stretched each shawl onto a wooden frame with spikes a couple of inches apart projecting all around the frame. Several shawls were stacked on top of each other and the tension was sufficient to cause the edges of the shawls to form peaks. After drying in a heated room the scalloped edges were set and the shawls ready for packaging.
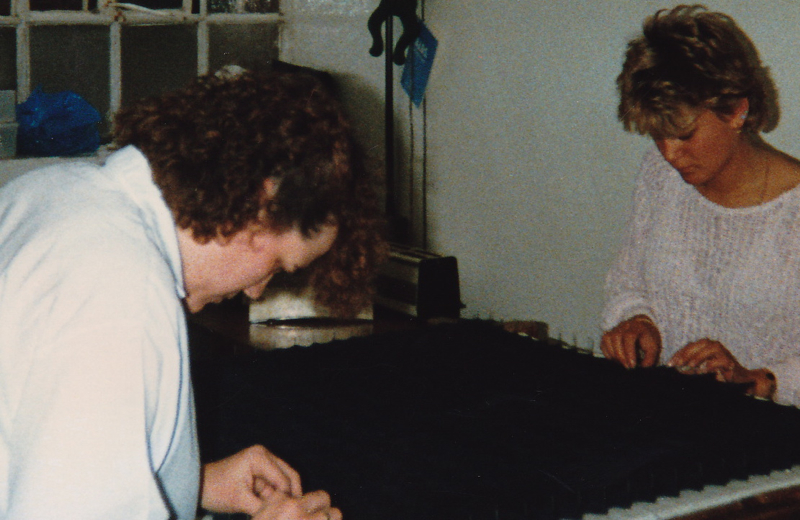
The photo isn't great but you can see the prongs over which the knitting was stretched.
I bought a very fine mohair scarf which has not been laundered and still has the blocked scalloped edge, the photo shows that the everlocked ends took the shaping better than the knitted sides. The scarf has been worn on a couple of occasions and just lives in a drawer with other scarves, it is not wrapped and kept with my other laces.
Detail of my scarf showing the overlocked edge at the top.
I also bought a heavier scarf which has been washed but not blocked back into the scalloped shape. It has also lost its label so I'm not sure what the fibre content is. It is made in the same way but a different lace pattern.
Today (6th Feb 2012) I was asked to make a winding of some wire. although wire is sometimes used to make lace with I don't include it in Threads For Lace and until now have not tried making a winding with it.
The wire is marketed by the German company Pracht and was in sizes 0.2mm and 0.3mm. In theory the 0.2mm should have wound at 50w/cm and the 0.3mm at 33 w/cm but as expected the wrappings were rather different. The 0.2mm was 32 w/cm and the 0.3mm was 26 w/cm and then out of curiosity I measured the wire threads in my craft box.
I have three reels of 0.2mm wire on exactly the same spools as the Pracht wire but without the tiny labels on the ends of the spools. They each measured 38 w/cm and felt noticeably finer than the Pracht wire. I also have one spool of 0.3mm wire on the same type of spool, again without a label. That measured 26 w/cm - the same as the Pratch 0.3mm wire.
Also in my stash is a reel of 0.2mm wire from Scientific Wire Company which measures 38w/cm and a reel of 0.3mm wire from Totaly Beads which measured 29 w/cm and alarge reel of tinned copper wire from Niglon Ltd marked 35 SWG 5amps which measured 38 w/cm.
Whilst I can accept that even though a winding looks neat and closely packed, with a rigid form such as copper wire a winding is not the most accurate way of measuring the thicknes so I hunted out my Dad's old micrometer and measured all of these wires. The results were:
| Unlabelled 0.2mm (green) | 0.008 inches | 0.2mm |
| Unlabelled 0.2mm (lilac) | 0.008 inches | 0.2mm |
| Unlabelled 0.2mm ( purple) | 0.008 inches | 0.2mm |
| Scientific Wire Co 0.2mm | 0.008 inches | 0.2mm |
| Pracht 0.2mm | 0.010 inches | 0.25mm |
| Totally Beads 0.3mm | 0.010 inces | 0.25mm |
| Pracht 0.3mm | 0.0115 inches | 0.3mm |
| Unlabelled 0.3mm | 0.0115 inches | 0.3mm |
My conclusion, from a very small sample of wires, is that although small reels of wire sold for craft purposes are labelled as 0.2mm or 0.3mm, either size might in fact be 0.25mm. Whilst that probably does not make a great deal of difference if you are using the wire to stiffen lace, for doing bead work, or making flower stems etc, it could be very significant if you are planning to pass any sort of electrical current through the wire. Caveat Emptor!
To make a winding all that is needed is a pair of accurately drawn parallel lines and the thread.
I draw the parallel lines with the computer. I have Adobe Illustrator but any drawing program should be able to do the same. I print half a dozen pairs of line onto a sheet of A4 paper and cut them apart. Then I fold the paper so that I have about eight thicknesses of paper to wind around.
I am right handed so I wind left to right. I start with a couple of wraps to the left of the lines just to get the thread anchored, then the first proper wrap is made so that I can just see the edge of the printed line. Further wraps are made so that each time the thread is lying close to the previous wrap but not overlapping and no gaps. I count as I wind and the last one is the one that allows just the right hand edge of the second line to show.
I then repeat the process. If I get the same result then that's the number of wraps/cm I record. If it's different I make another wrapping and almost always that will be the same as one or other of the first two, although some threads (especially very fine springly threads like waxed cotton or wrapped metallics) can be difficult tomeasure accurately.
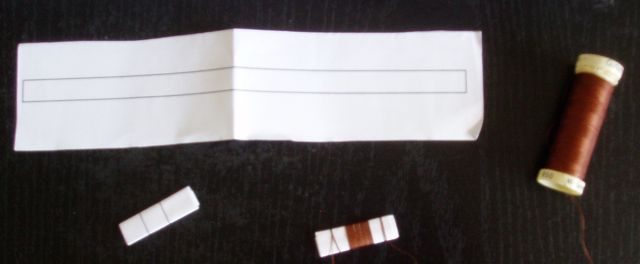
The picture shows the stages of wrapping Gütermann polyester SewAll sewing machine thread which I measured as 31 wraps/cm.
I read with interest Sue Dane's article about the new Coats Lace thread in the January 2010 Lace Guild magazine - as did others as I received several enquiries asking if I had seen this new thread yet. I now have samples of these threads (branded with the original name, Coats Cometa Encajes) from three different sources and whilst they look to be nice threads they are *not* a direct substitute for Filato per Tomboli di Cantu - as the Coats Special Projects Manager told The Lace Guild at Alexandra Palace.
Not only do the thicknesses not match with any of the old Filato di Cantu threads, they are spun differently too. The Filato di Cantu are/were all 3 ply S spun; the Cometa varies depending on the size!
No 20 is 2 ply S spun; No 30 is 3 ply Z spun, No 40 and No 50 are both 2 ply Z spun.
The direction of spin makes a lot of difference to some lacemakers and not much to others depending on how they handle the bobbins on their pillow. I personally don't have a problem with either direction of spin but some people do find that one direction or the other tends to unwind as they move the bobbins about. Generally any thread originally intended for lock-stitch sewing machines, whether for stitching seams or embroidery, will be Z spun to suit the action of the mechanisms and anything intended for hand sewing, or bobbin lacemaking, is S spun as that suits the majority of (right handed) stitchers.
The difference between 2 ply and 3 ply thread makes a difference to everyone. A 3 ply thread is generally firmer and rounder than a 2 ply thread of a similar thickness. A 2 ply thread flattens more and will squash together to make a soft lace that will drape and gather well whilst a 3 ply thread makes a crisper lace, perhaps better suited to household use.
There are very few 3 ply S spun cotton threads available; Brok 100/3 and 120/3, both much finer than Cometa, Presencia Fincrochet 10, 20 and 30 all much thicker, and YLI Colours which is between Filato di Cantu 30 and 40 in thickness. The only other S spun 3 ply threads that I have seen is Idrija lace thread from Yugoslavia/Slovenia which is/was marketed by Coats in Eastern Europe!
I have measured the Cometa threads as:
Size 20 = 2S-20 w/cm. This would substitute for the defunct Danish Flower Thread
Size 30 = 3Z-23 w/cm. Same as Brok 24/3
Size 40 = 2Z-26 w/cm. Same as Aurifil Mako 28 wt
Size 50 = 2Z-28 w/cm. Would substitute for the old DMC Retors/Brilliante 20
The nearest substitutes currently available for the old Filato di Cantu are:
Filato 30 = 3S-21w/cm = Presencia Finca 20 = 3S-19 w/cm so slightly thicker
Filato 40 = 3S-32w/cm = Amann Sylko 50 = 3Z-32w/cm; same thickness but Z spun
Filato 50 = 3S-34 w/cm = Presencia Finca 50 = 3Z-34 w/cm; same thickness but Z spun
Update - 6th February 2012
I have today recieved, from The Netherlands, some reels of Anchor Lace thread (filato di Cantu) which I have measures as follows:
Size 10 = 2Z-17 w/cm
Size 20 = 2S-20 w/cm
Si
ze 30 = 3S-23 w/cm
Size 40 = 2Z-26 w/cm
Size 50 = 2Z-28 w/cm
It is not unusual to find threads sold in UK as Coats brand marketed as Anchor or MEZ iin Europe.
My conclusion is that the same mish-mash of threads sold in UK as Coats 'Lace' thread is available on the continent as Anchor 'Lace' thread, although size 30 is spun in the opposite direction, and although the Anchor brand actually states 'Filato di Cantu on the labels, these threads are not the same as the old Filato di Cantu.
 |
 |
Click on small images for a detailed scan. |
|
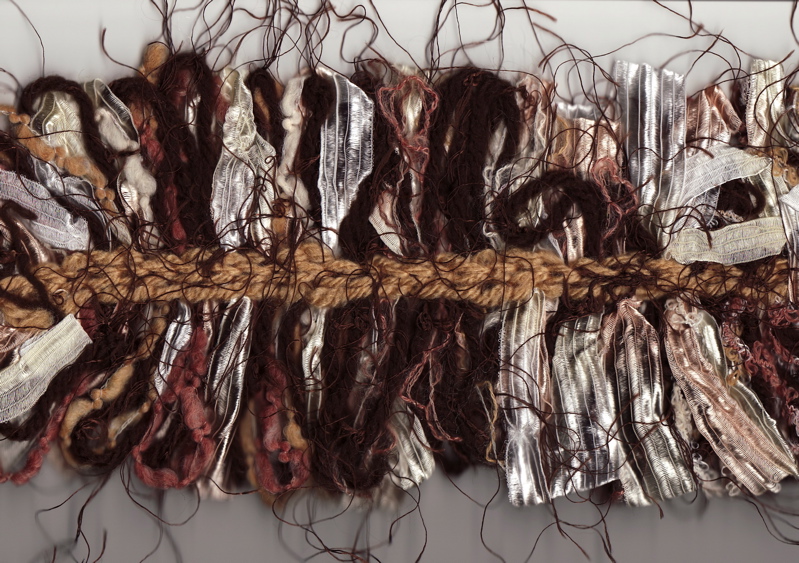
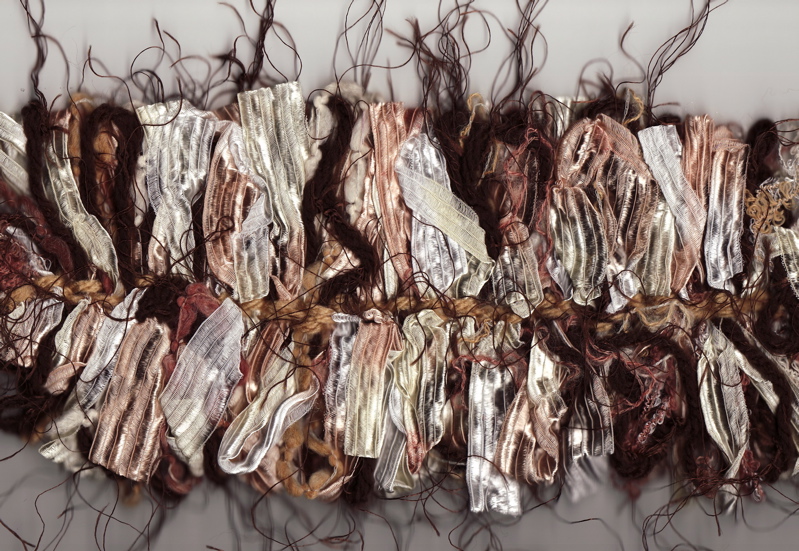
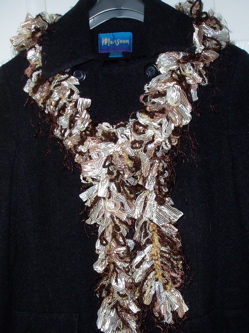
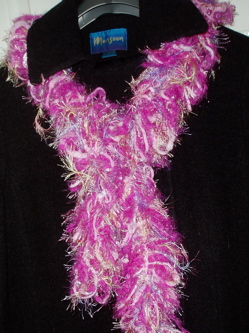
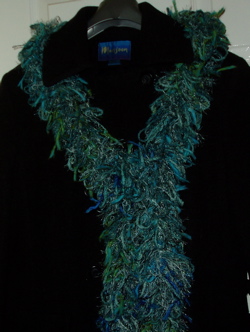
Handmade scarf made by a colleague of my daughter - is it stitched together? or hairpin crochet? or what?
The scarf is about 4" 10cm wide and in wear the loops go in all directions and cover the centre stitches.
There are several joins in the centre yarn suggesting stitching with a needle but how would the loops have been controlled?
In some places the loops will move between the stitches but they are mostly held quite firmly and in a few places the centre yarn
passes right through the very loosely woven ribbon.
Thanks to the good people on the Arachne list the technique has now been identified - it was almost certainly made with a "Loopa" tool. The instructions effectively tell you to wind the fancy yarn around their plastic 'hairpin' and work crochet chains to hold the loops together. They don't say a hook is required and so that implies using your fingers to make the loops, and then to go back and work a row of back stitching over the loops. That certainly seems to be the way the scarf Lucy gave me was made. They also imply that it's knitting as knitting pins are not required. Knitting it is not!
I've had a play and made a 'hairpin' from two pieces of A5 card sellotaped together. I tried working crochet down the middle, but had the usual problem with working hairpin crochet; if you work towards the open ends of the prongs the work bunches up and gets jammed against the bottom of the hairpin. If you work away from the open ends the work will slip off as it grows but it is very difficult to manipulate the crochet hook. So, I tried using a needle and stitched the loops together.
For the first effort I wrapped the fancy yarns around the 'hairpin several times and stitched down the middle. Back stitch was too stretchy, it had to be chain stitch. That worked reasonably OK but I found that I missed quite a few threads on the back and so had to work a second row of chain stitches down the other side to catch them all in. That was a bit tricky because of all the loops, but the scarf looks OK.
The second try is much better. This time I turned the hairpin a full 360 degrees to make loops on each side then used a needle to work a chain stitch making sure that all six fancy threads were caught in the stitch and repeated until long enough. That looks much better with only one line of chain stitch down the middle.
 |
 |
 |
The original scarf showing two rows of chain stitching with a thick yarn. (DK) |
My first try with two rows of chain stitch using 4ply. |
My second scarf with only one row of chain stitching - barely visible. |
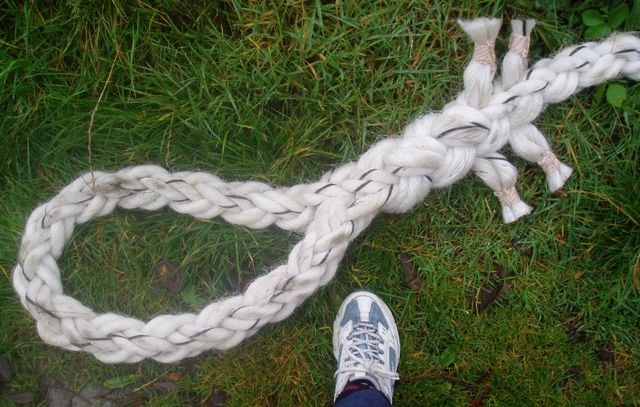
A length of bobbin lace plait found near the quey on St Agnes Island, Isles of Scilly.
At first glance this appeared to be a thick cabled rope, but closer examination showed that it is actually made with 8 strands of S twisted cord used in pairs to make a mirror image 4-pair plait. I intentionally included my (very wet!) foot in the photo to show the scale. A chunky trainer shoe 11 cm wide, so each cord is about 2cm diameter and the dark strand running through some of the cords clearly shows the S spin.
Instead of the usual 2 over 3, 2 over 1 & 4 over 3 this braid is worked 3 over 2, 1 over 2 and 3 over 4.