This Bruges mat was drawn in the traditional way with pencil and paper - well actually I preferred to use ink (and Tipp-Ex) because it photocopies better. The scrolls were drawn freehand and fillings traced from master copies. Half the mat was drawn, photocopied and two halves stuck together. For non-geometric patterns this is still the way I would design lace.
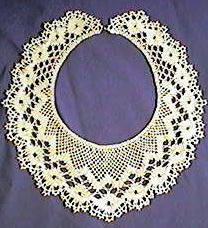
The first inkling I had that computers could help with lace design was back in the mid 1980s when a student came in with some circular grids that she had programmed her BBC micro-computer to draw. These grids were easier to use than polar graph paper and not restricted to divisions of 180°. My chosen project for City & Guilds Lacemaking, which I sat as a 'Guinea-pig' in 1987 was lace collars; this example used pieces from several grid joined together. A collar is not a regular circle, it has a tighter curve at the sides, over the shoulders if it is to sit correctly.
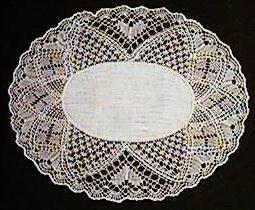
It wasn't long before Trudy came in with elongated circles - true ellipses not just two semi-circles with a length of straight grid in between. This mat was designed over one of those grids.

Another mat designed over one of Trudy's grids. This pattern was published in The Lace Guild's 'Pattern Book 3' in 1988.
Soon after that I bought my first computer, an Amstrad PCW. Once I'd learned how to type a letter and a few teaching notes I wanted to use it for lace design and I discovered a program called 'MicroDesign2' which would let me draw dots and another called 'Tweak' which would alter the shape of a group of dots, ie the first 'bent' lace pattern. This mat was one of the designs I achieved - part of the lacemaking was done in Canterbury Cathedral during a lace exhibition in 1990.
By this time Trudy had upgraded to an Archimedes computer with RISCOS2 and anything I could do on the Amstrad she could do much quicker. The poor little Amstrad with just 512K of memory and no hard disc was hard pressed, and excruciatingly slow, to do what I wanted. Sometimes I left it running all night because it took several hours to change a straight design into an arc. This is another of the Amstrad generated designs.
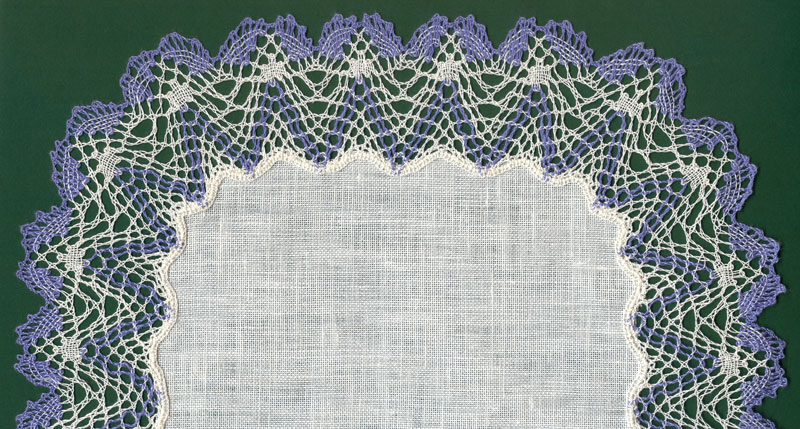
Trudy and I were able to bounce ideas off each other as to how we could re-shape prickings. This is a circular edging pushed sideways from the outside to become almost square but still with the circular centre.

Another idea we came up with is to stretch the outer edge of a pattern and compress the footside form a trapezium with angles of 45° and 135° and then four sections butted together to make a corner, but not the traditional mitred corner of torchon lace. This piece of lace was worked from an Amstrad generated pattern but it was one I re-drew when I too upgraded to an Acorn computer.
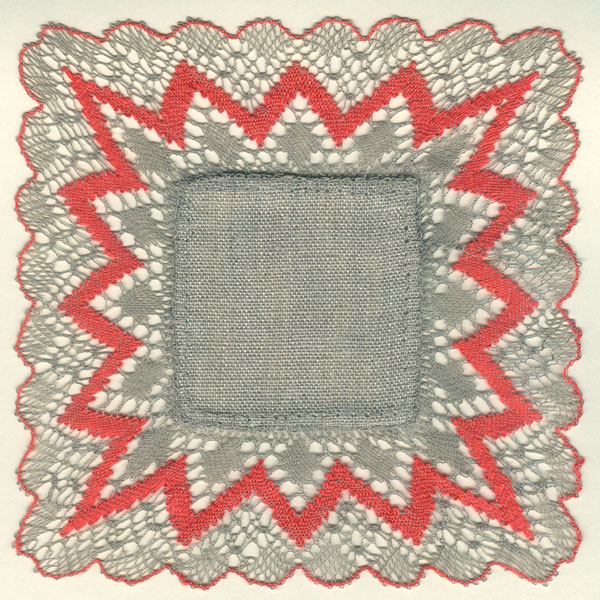
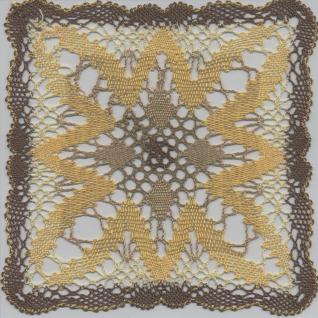
One thing that interested me was how many variations could I get from one basic pattern. Here is a fairly simple design with zig-zag trail and spiders with non-mitred corners.
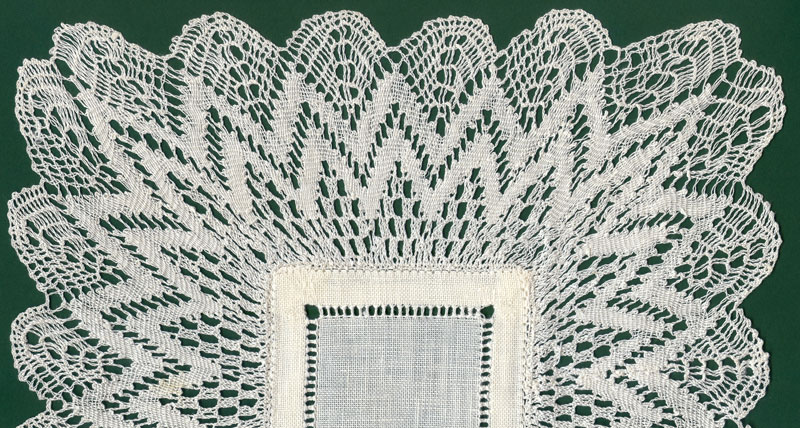
Here it is again as a square-within-a-square, the inner (foot) edge is at 45° to the outer edge, and only half as many repeats.
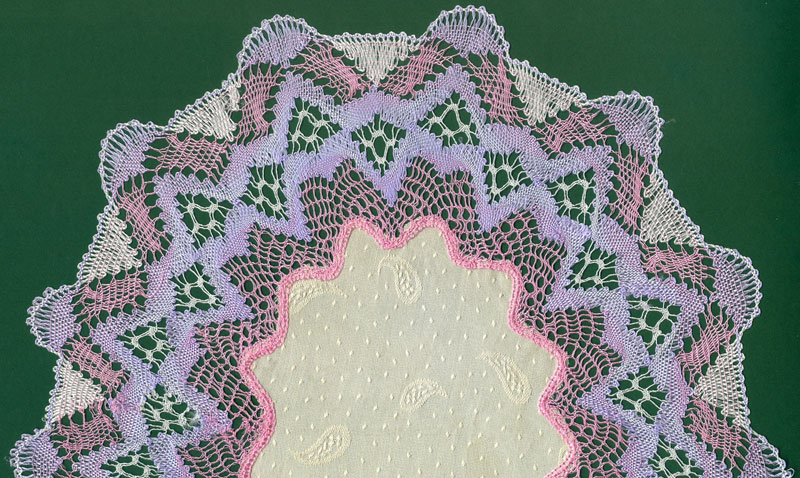
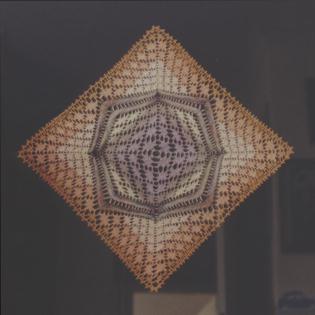
Another variation of the same pattern. This time the edging was formed into a wave shape and then that was formed into a 60° arc with tapered sides and then six sections brought together to form a sort of hexagonal circle.


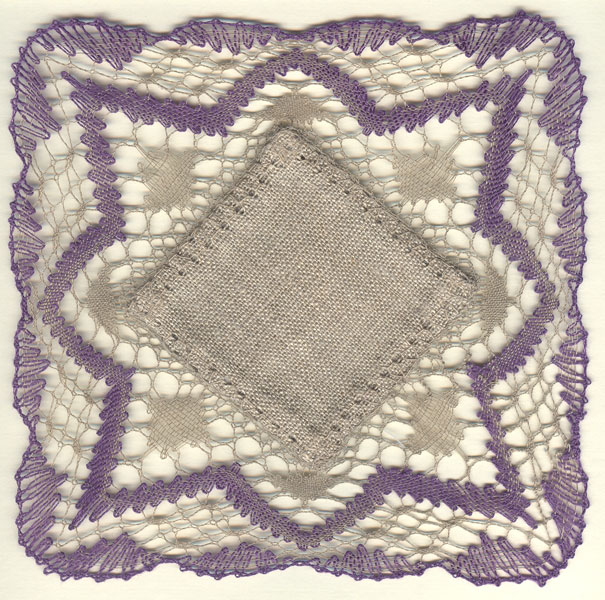
Yet another variation of that pattern, this time the square mat. One quarter of it (including the mitred corner) was elongated to form a lozenge with the acute angles at 45°, copied seven times and then the sections joined together to form a star shape. Five, six and seven pointed stars are obtained in the same way; any more points and the working angle becomes too steep!
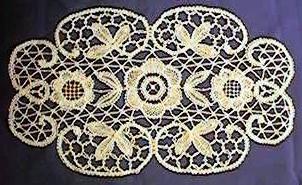
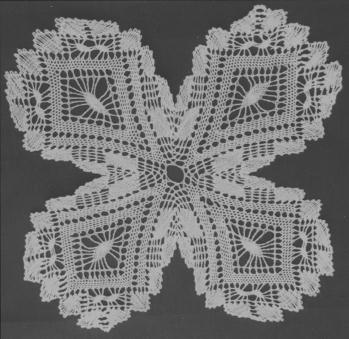
A different pattern this time. The clover leaf shape is about as complicated as it gets. It began as a 'runner end' with the little fans along three sides. It was moulded to make the two opposite fan edges bulge outwards, then the plain edge was pulled down into a 45° 'V' shape. That section was copied four times and then assembled to make the clover shape. The resulting pattern was started on two opposite arms and worked towards each other; then half the bobbins from each side worked the top and the other half worked the bottom.
Having concentrated on computer manipulation of patterns for several years, 1996 saw a change in direction. I was fortunate enough to secure a place on a two hour workshop with Jane Atkinson at The Lace Guild Convention in Scarborough. There we used a variety of very thick threads to make a random torchon sampler. I couldn't wait to get home to work some more. Several samples later I felt confidant enough to design this waistcoat.
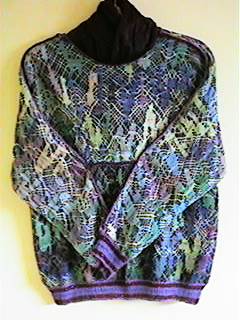
That was soon followed by a sweater. Both these patterns were hand drawn, but over sheets of computer generated 5mm grid. I printed the dots onto tracing paper so that I could have a design sketch underneath (random shapes marked with a wax pastel to indicate the cloth stitch areas), but now I can draw similar random patterns without that help! The finished sweater has a knitted trim for which I used 2ply Shetland laceweight wool.
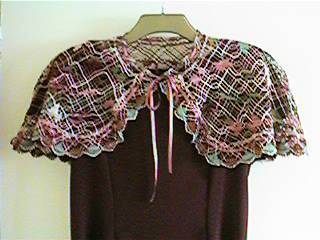
A third piece of big wearable lace was this shoulder cape, worked especially for a Lace Guild Convention banquet, although this piece does have a regular pattern sequence.
After that I went back to computer manipulation - and yes it's that same basic pattern again, but on a large scale with thick threads.
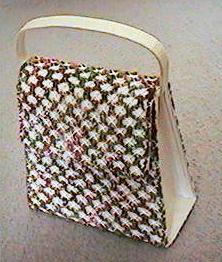
This was a purchased bag which I covered with lace, the pattern having been computer moulded to fit the shape of the bag. It's very simple, just a combination of CT pin CT and CTCT pin CTCT and worked with relatively fine cream linen and a thick random dyed chenille. I first saw that combination of stitches as a ground in a piece of lace in an old pattern book belonging to The Lace Guild.
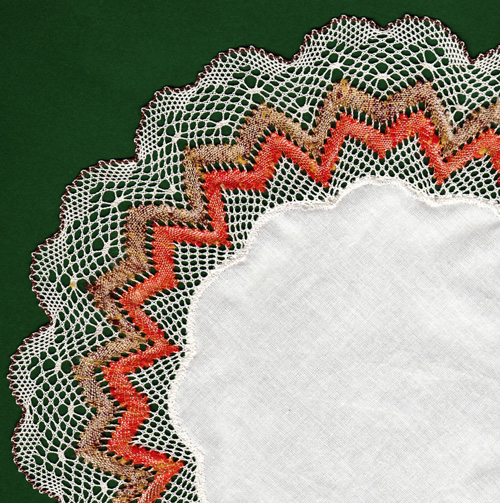
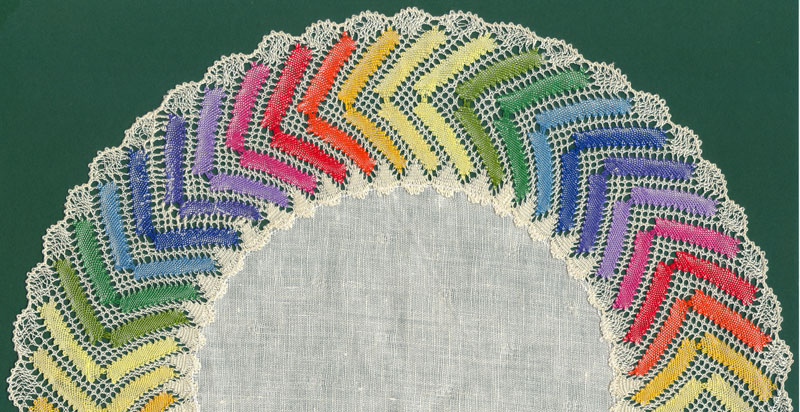
This rainbow mat has proved to be popular with other people. The pattern was computer generated but there are no special effects. One day I will work it again but with the blocks all one colour going from light to dark and back again. Different coloured workers were added for each cloth stitch block but I didn't take out the corresponding ecru pair, it stayed in as an extra passive pair, the net result was less ends to darn in when the lace was completed.
This piece was based on a design by Jane Atkinson called 'After Vasarely' so mine is "After 'After Vasarely". It was hand drawn over a logarithmic grid produced by Deborah Robinson.
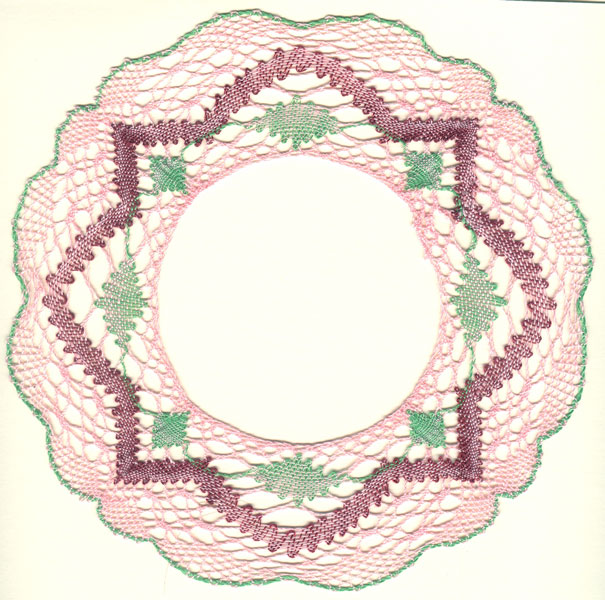
Soon after I'd completed "After 'After Vasarely'" Deborah published an article about her logarithmic grids in 'Lace'. That started me thinking about how to use !TypeStudio to produce logarithmic grids by moulding and the result was a pair of mats - yes the same pattern yet again! This one was printed in The Lace Guild's publication 'Logarithmic Lace'.

This version of the mat has the logarithmic spacing positioned differently, and has a gimp added to emphasize the circular pattern formed.
I also tried putting a length of straight edging into a one-way logarithmic mould and then formed the resulting pattern into a circle. Not dissimilar to the square-within-a-square version seen earlier.
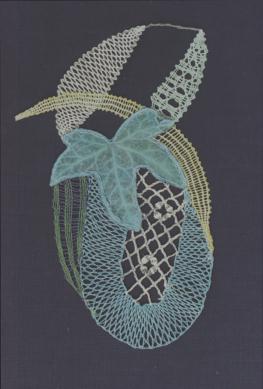
'Ivy leaf' was started in another two hour Lace Guild Convention workshop, this time with Jitka von Lindern and there wasn't a computer in sight. It was drawn free-hand and incorporated a found object (a magazine picture of a leaf covered with blue sticky plastic). This design was my 2001 Christmas card.
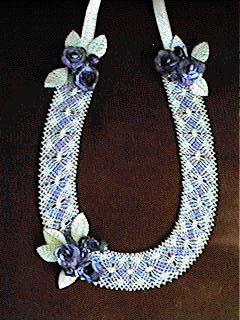
It was back to the computer to draw Emma's wedding horseshoe. The lace is very simple, just a few spiders and control of the blue threads in the ground, but I couldn't have got it into the horseshoe shape without the computer. There are two layers of lace with transparent acetate sandwiched in between.
 |
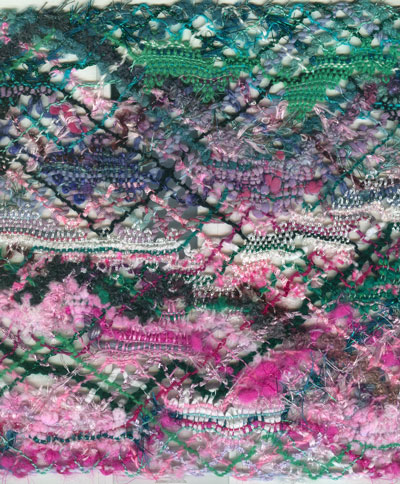 |
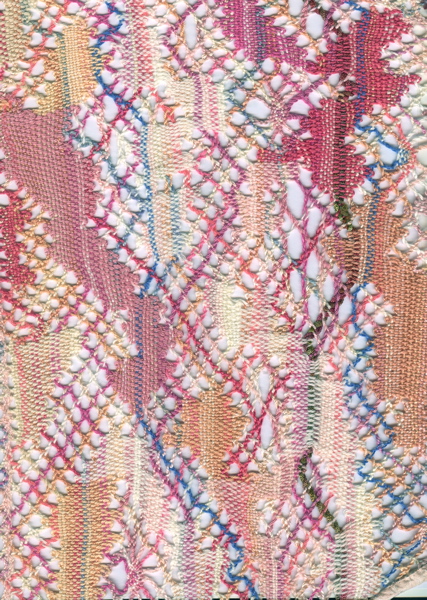
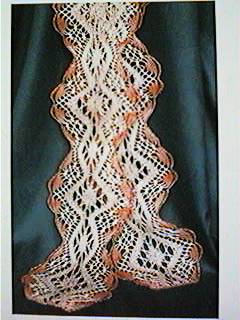
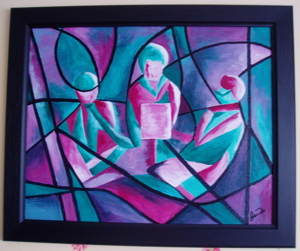
Having pushed the computer bending and stretching of patterns as far as I could my interests have turned to colour and texture in bobbin lace. Going back to the random torchon of the waistcoat and sweater I decided to make a scarf based on the two coloursI had used for my abstract painting 'Three Artists; Pink and Green'.
Just the two colours, quinacridone magenta, a blue- red, and Phthalocyanine green, a blue-green plus white produced a wide range of colours and tones which I scoured the shops and my stash of thread and yarn to find matches for in order to work a scarf which is 8 inches / 20cm wide. The colours are closer to the orginals in the close up scan of the scarf.